 Delicious Deviled Eggs
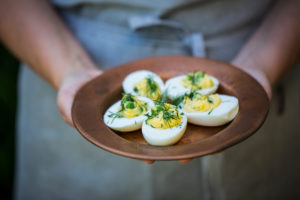
After working on new spring recipes last week, I was left with a glut of hardboiled eggs. When life gives you lemons, right? So these deviled eggs were born, and boy am I happy they were. With Easter right around the corner, this recipe will come in handy to use up all those decorated eggs. And it’s pretty enough to serve for Easter brunch.

Herbed Eggs
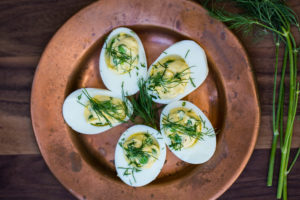
With dill, chives and peas added to the mix, these deviled eggs are a spring take on a classic. I like Virginia Willis’ method for deviled eggs from her cookbook Bon Appetit, Ya’ll. The eggs are perfectly cooked, and the filling is simple (she adds some soft butter to her egg filling to make it extra silky, but I leave it out to keep things dairy-free). I had peas and dill sitting on the counter from this Spring pea and leek tartine and I didn’t want them to go to waste. And the chives growing in my garden were just begging to be used.
I tried two recipes using up the hardboiled eggs: Egg salad on crusty bread topped with radish slices and deviled eggs with dill and peas. Later that night, I set out the deviled eggs as an appetizer while I was making dinner. Before I knew it, those puppies disappeared (I may or may not have helped devour two of them).
 A Creamy Filling
The base of the filling is just a quick mixture of yolks, mayo, Dijon, chives and dill. You can mix it together in a food processor, or easily stir it together by hand. Add in the peas, and then fill a plastic bag with the yolk fixture. Cut one corner of the bag (start small, you can always cut a larger opening) and fill the halved hard boiled eggs. Top with fresh herbs and a sprinkling of sea salt.
 Make Ahead
You can make everything a day ahead and fill the egg whites Easter morning — I recommend swiping one for breakfast before heading to church. To make the egg salad, simply chop up the whites of the hardboiled eggs and combine with the deviled egg filling. You can use the egg salad for sandwiches, crostini or a tartines topped with pink watermelon radishes. Whether you opt for the deviled eggs or the egg salad, there’s not a tastier way to add a pop of green to your Easter brunch table.

Deviled Green Eggs with Peas and Dill
Ingredients
- 12 large eggs week old eggs are easier to peel
- 1/3 cup mayonnaise
- 1 tablespoon Dijon mustard
- Pinch cayenne pepper
- Coarse salt and freshly ground pepper
- 1 tablespoon finely chopped chives
- 1 tablespoon finely chopped dill
- 1/2 cup peas
Instructions
- To cook the eggs, place them in a saucepan and add water to cover by an inch or so. Bring to a boil over high heat. Remove from the heat, cover, and let stand for 12 minutes. Drain the eggs and rinse under cold water. Set aside to cool.
- To peel the eggs, tap each egg on the counter all over to crackle it. Roll an egg between your hands to loosen the shell. Peel, starting at the large end, while holding the egg under running cold water; this makes peeling easier and removes small bits of shell stuck to the egg.
- To make the filling, halve the peeled eggs lengthwise. Carefully remove the yolks with a small spoon. Set the whites aside. In the bowl of your food processor, blend the yolks, mayonnaise, Dijon, cayenne, salt, pepper and herbs and mix until smooth. Remove the blade, and stir in the peas by hand.
- Place the mixture in a plastic bag and cut off a small portion of one corner.
- To assemble the eggs, pipe the yolk mixture into the whites. Garnish with additional herbs and serve immediately.
- To make ahead: Unpeeled hard-cooked eggs can be refrigerated for up to 1 week. Or prepare the eggs, but don’t assemble, up to 8 hours in advance of serving; refrigerate the whites covered with a damp paper towel and stored in an airtight container. Store the egg-yolk mixture in the piping bag. Knead the yolk mixture slightly to soften before filling the yolks, and cut off the corner of the bag just before serving. The eggs may also be assembled and stored, covered, in the refrigerator for up to 2 hours. Any longer and the yolk mixture starts to form a crust.
Leave a Reply