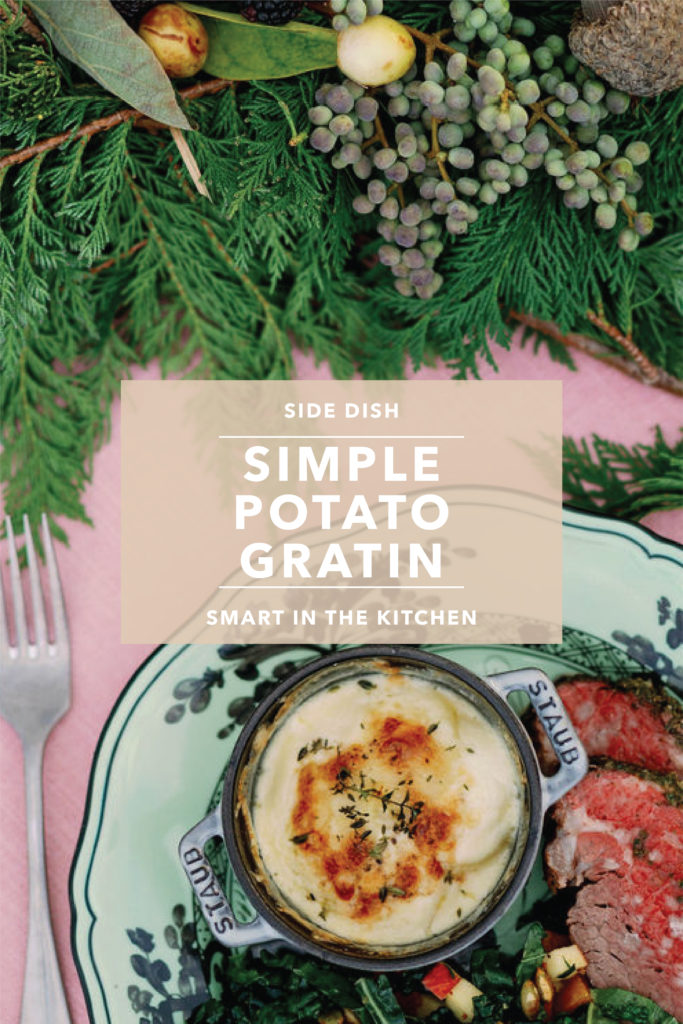
Simple Potato Gratin
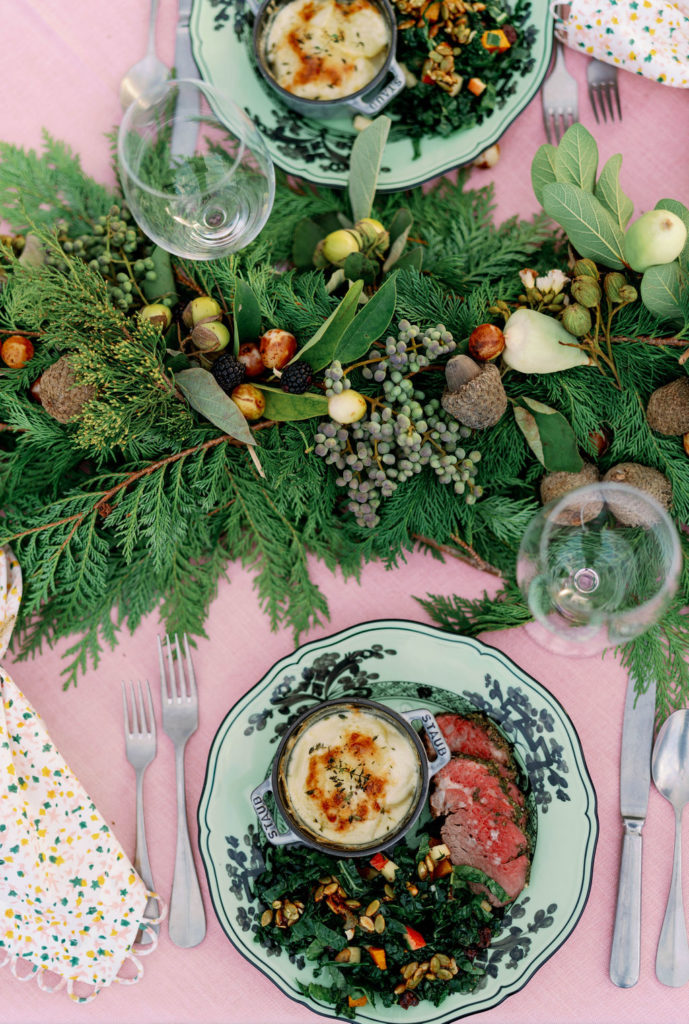
Imagine this: A rich and creamy potato gratin recipe that’s easy to assemble and restaurant quality—it’s this Simple Potato Gratin. I first came across a variation of this recipe during my cooking school days, and it’s been a beloved go-to ever since. We made a similar variation when I took a course at Cook’s Atelier a few years ago, paired with a roasted rack of lamb, it was French dining at its best. Think layers of thinly sliced potatoes, soaking up heavy cream infused with garlic and herbs, then baking it into golden perfection. It’s fancy enough to impress at a dinner party yet cozy enough for a weeknight feast. Prepare yourself for a recipe that will be your go-to for years to come. I promise everyone will be reaching for seconds!
What is the difference between scalloped and au gratin potatoes?
The main difference between scalloped potatoes and potatoes au gratin is whether or not cheese is used. Potatoes au gratin always uses grated cheese in the recipe, and most often something that melts into creamy goodness, like gruyere or comte. Scalloped potatoes do not, they use heavy cream or milk. Also, the slices of potato for scalloped potatoes tend to be thicker than in a gratin. I also think that Americans tend to use the phrase “scalloped” as a catch-all descriptor for this type of recipe, but the word “gratin” is the giveaway — it’s a culinary term for topping a dish with cheese and sometimes breadcrumbs and browning it under the broiler. Can I get an Amen?
How to freeze potato gratin or make it ahead
Make Ahead: This dish can be assembled a day ahead; cover tightly with plastic wrap. pressing the wrap directly against the surface of the potatoes so they don’t turn brown from oxidation. Store in the refrigerator and bake before serving. The potatoes on top might still discolor a little, but it shouldn’t be noticeable after baking. Sometimes the potatoes soak up a lot of the cream, so you can also drizzle an extra 1/4 cup over the top of the dish before baking.
To Freeze: Once cool, wrap the dish tightly in plastic wrap and then foil. Use a strip of masking tape to label and date the dish with baking directions. Freeze for up to 6 months. Cook from frozen, with the foil and plastic wrap removed, in a 350-degree oven for 30 minutes or until piping hot.
Looking for more vegetable side dish recipes?
Chia Seed Protein Pudding
Equipment
Ingredients
- 1/2 cup chia seeds white or black
- 1 3/4 cups vanilla almond milk
- 1 scoop plain protein powder
- 2 tablespoons honey, agave or maple syrup
- 1/2 teaspoon vanilla extract
Instructions
- In a large mixing bowl, whisk together all the ingredients. Use a ladle or a measuring cup with a spout to portion the chia mixture into mason jars, glass cups or bowls. Give the mixture a quick stir in between filling each container. Refrigerate overnight.
- Optional toppings: Berries, kiwi, banana slices, coconut flakes, sliced almonds, almond or peanut butter or granola. You could also add a dollop of plain or vanilla yogurt on top for extra protein and creaminess.
Notes
- I use MALK brand almond milk or homemade; you can also use non-fat, 2%
or whole milk or a combination of coconut milk and almond milk. - I use 365 Brand Unflavored Organic Whey Protein Powder; I stock up
whenever I’m at Whole Foods. - If you use vanilla protein powder in this recipe, reduce the amount of
honey or sweetener. I’d add 1 ½ tablespoons honey instead. - I like to top my chia pudding with a scoop of low-fat plain Greek yogurt, which adds more protein and berries.
- Turn this into a chocolate variation with ¼ cup cocoa powder.
- Add ¼ cup of quick-cooking or old-fashioned oats to make this into overnight oats.
Leave a Reply